
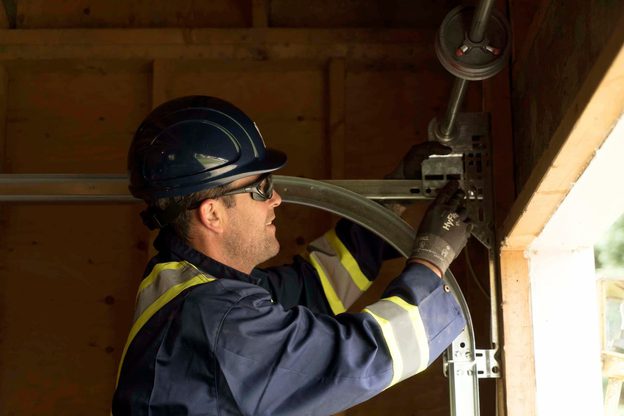
Garage doors are complex devices with a lot of heavy, moving parts that can wear down or break over time. From loose parts and stretched out springs to rusty tracks and dead batteries, the smallest issue, can affect the safety and security of your door. When something goes awry with your garage door, troubleshooting the issues yourself could help save time and money on repairs and could help you spot problem areas before they affect your door’s functionality.
At Creative Door Services, we have more than 55 years of experience helping homeowners just like you get the most out of their garage doors. Over the years, we have developed many different tips and tricks to help you identify issues with your garage door and get a better understanding of what repairs need to be done. As certified garage door pros, we feel it’s our duty to share those tips with you to keep your garage door in great working condition for years to come.
Disclaimer: When you are troubleshooting it, it’s vital that you are careful and that you follow all directions properly to avoid injury to yourself or damage to your door. Although the cost savings from DIY work can be tempting, if you do experience any garage door problems, it’s much safer and easier to call a trained professional technician from Creative Door Services. Garage doors are heavy, and you can risk serious injury if you don’t have the right training and experience.
Check Your Door's Balance
You should be able to lift your garage door manually with little effort. If you have to force it to open, your door is likely unbalanced.
Other telltale signs include unusual noises, buckling or bending and your door appearing loose or lopsided when opening and closing.
If you suspect your garage door is unbalanced, test it out:
- Disconnect your garage door opener by pulling the red-handled release rope hanging near the top of your garage door. This will allow you to open and close it manually.
- Carefully lift your door to a half open position.
- After making sure that there's nothing in its path, slowly let go of your door.
- A properly balanced garage door will stay in the half open position.
- If your door closes, the garage door springs need more tension.
- If your door opens, the springs have too much tension.
Note: To avoid injury, don't attempt to adjust the tension of the springs unless you're a trained professional. An unbalanced garage door poses a safety risk and may require an expensive repair if left to worsen over time. Contact us to set up a service call today.
Lubricate Your Door
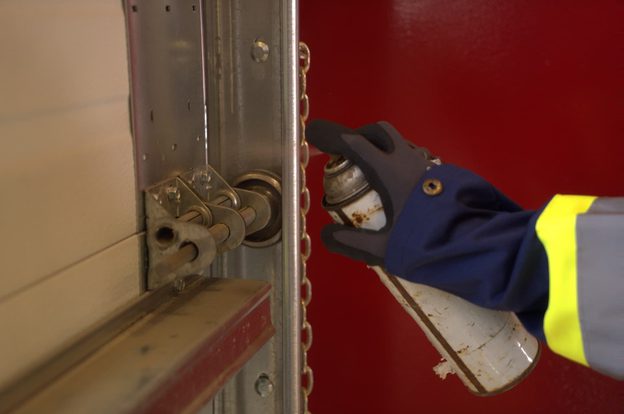
Is your garage door squeaking or grinding? Is it struggling to open and close? It may need lubricant. To keep your garage door working at its best, we recommend lubricating all metal moving parts at least once a year.
Follow these steps for lubricating your garage door:
- Select a lubricant that's specifically formulated for use on garage doors, such as a silicone lubricant. Avoid using grease as it tends to attract dust and dirt.
- Place a few drops of lubricant on each hinge and spring shaft bearing, as well as a bead of lubricant along the top of each spring.
- Using a rag, gently wipe away any excess lubricant.
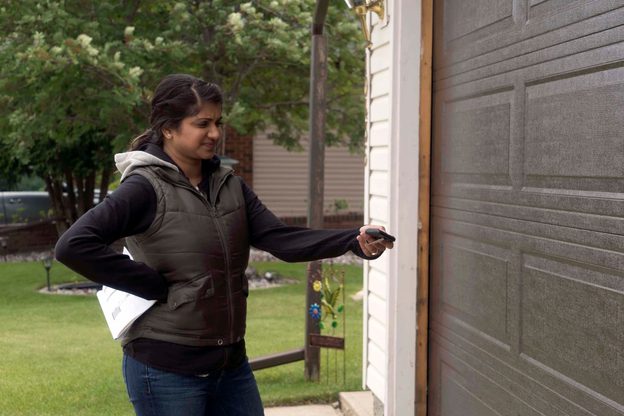
Test Your Reversing Mechanism
Since 1991, all garage doors have come equipped with an auto-reverse sensor. This built-in protection feature is made to detect any resistance when the door closes, stopping the door in its track the moment an object is noticed by the sensor, enhancing safety for you and your family.
You should take the time to test your auto-reverse function periodically to ensure it functions as intended. Testing it is easy: put an object on the floor underneath where the garage door will go, then hit the close button. You can use something as simple as a block of wood or even a roll of paper towels. If the door automatically reverses when it touches the object, then your reversing mechanism is working as intended and you can rest easy. If your door continues to close despite the object in its path, you should call the professionals at Creative Door Services for repairs as soon as possible.
Fixing Gaps and Drafts
A drafty garage door with gaps is a frustrating issue for homeowners because it can mean you lose heated air in the winter, and it provides an entryway for damaging moisture and pests. There are a few different reasons that your garage door might be drafty, such as cracked weatherstripping, damaged bottom seal, or misaligned panels. Some gaps may be large enough for you to see unaided, but others will be too small to notice. Common signs of worn weatherstripping include light coming through the gaps around the closed door panels and water leaking through. You may also note visible damage such as cracks, flattening, or bending in the weatherstripping. Because there is a wide range of issues that can cause gaps in your garage door, the best solution is to call a professional such as Creative Door Services. We will be able to diagnose the exact issue and provide a solution.
Cleaning Tracks
Garage door tracks can easily accumulate dirt and debris without you noticing. Because the tracks are an essential part of the door’s movement, debris can quickly become a problem. The grime can lead to jerky movements and grinding noises when the garage door is in motion and may even cause the door to become stuck entirely as it can block the door from moving or cause wear and tear along the tracks.
Cleaning garage door tracks requires nothing more than a few basic steps:
- Disconnect the opener. You do not want the door to open while you’re up there.
- Use a ladder to get up there and inspect the tracks. There may be a lot of debris, such as spider webs, leaves, dust, and maybe even a missing screw. Ideally, the tracks should look clear and smooth.
- Brush the tracks out using a stiff-bristle wire brush. Start from the top and work your way down.
- Get into all the little nooks and crannies with an old toothbrush.
- Grab a damp rag and wipe everything down one last time to get any remaining bits and pieces.
- Your tracks should look clean and clear now. Reconnect everything and give a test run, then you’re done.
With a bit of effort, the tracks will look good as new in no time. If you have trouble reaching these areas or don’t feel comfortable doing it yourself, calling the professionals at Creative Door Services is the best way to ensure your tracks are fully cleaned. You can trust our experienced technicians to ensure your garage door’s tracks are spotless by the time they’re done. They’re safe, efficient, and effective.
Test the Sensors
Photo eye sensors are a key safety feature that have been standard on all garage doors since 1993. Their function is to detect if anything enters into the path of the garage door and trigger an auto-reverse function to prevent the door from hitting the obstruction, preventing damage or injury. The two sensors, which are located 10” or so above the ground floor, send a signal across the opening. When this beam is broken, the garage door stops and reverses direction (or it doesn’t move at all).
If your garage door isn’t moving at all when you try to close it, it may be because the photo eye sensor is obstructed. You can check to see if the sensor is covered by dust, cobwebs, or mud that might cause it to trip. It may also be an alignment issue. If the sensor is clean but your door still won’t budge, calling a professional garage door repair technician is the smart option to get an accurate diagnosis and prompt repairs.
Garage Door Opener Remote Control Care and Troubleshooting
Troubleshooting your garage door opener can help save you a lot of trouble by identifying potential problems early. Some problems can easily be fixed on your own, while others require professional intervention. A few troubleshooting techniques you can do include:
- Replacing the Battery: Your first step should always be to check the batteries. Dead batteries is a common problem and one that’s very easy for you to fix yourself. Batteries can easily be depleted by cold weather or by simply being old and worn out.
- Reprogramming Your Opener: It’s advisable to reprogram your garage door opener at least once when you move into a new home so that it clears the old codes and ensures you’re the only one with access. You should also reprogram it if your current remote is ever lost or stolen. To reprogram your opener, first find the Learn button on the opener. Press and hold it until you see a flashing light. Now you should be able to operate the door with your remote.
- Check the Antenna: The antenna is where the opener receives the signal to open and close from the remote. Dirt can interfere with its ability to pick up the signal properly. Check the opener’s antenna for dirt or signs of damage. In some cases, a simple wipe-down can be enough to get it working again.
- Check the Operation Panel: There is a lock button on the door’s operation panel that toggles on and off. When it’s on, it prevents the door from opening. It can be easy to toggle by accident by a child or by hitting it without noticing. Hit it once and then go outside and try the remote control again.
- Removing RF Interference: Radio frequency interference (RF interference) can cause issues with your garage door remote. It may cause your door to open and close on its own as some other object is sending signals that the opener is receiving. There are many household objects, such as security lights, battery chargers, and wireless doorbells, that are common sources of RF interference. Identify potential sources and unplug them one at a time, checking the garage door’s operation while the device is disconnected. You can learn more about fixing RF interference on our blog.
- Reset the Receiver: Resetting the receiver clears its memory and allows you to reprogram the remote. It requires unplugging the garage door opener and disconnecting wires, so it should be left to a professional who knows their way around a garage door.
Common Garage Door Issues and Solutions
Issue: My garage door will open 6" to 8" and then close. What's wrong?
Solution: The springs at the top of your garage door may be broken and will need to be replaced. If the springs haven't been replaced in the last three years, we recommend doing so to keep your door operating at its best. If your commercial door has tubes, not springs, or if you're unsure, give our team a call.
Issue: My garage door starts to close, but when it’s about 6” to 8” down from the top, it opens again. Why is this happening?
Solution: This is likely due to a photo-eye alignment issue. To find out, hold down the control button on the keypad inside of your garage. If your door closes, your photo eyes are misaligned.
Photo eyes are small, plastic devices located about 10" from the floor on both sides of your garage door. These devices are equipped with lenses that emit an invisible beam across the opening of your door. If a person or object disrupts the path of the beam, it prevents your garage door from closing.
To fix the problem, first make sure that there aren't any objects blocking your photo eyes. If the area is clear, follow these steps to realign them:
- Using a measuring tape, measure from the ground up to the centre of one of the photo eyes.
- Next, measure out from the wall to the centre of the photo eye. Write these measurements down.
- Take the same measurements for the other photo eye.
- Carefully adjust them to the exact same measurements.
- Press the button on your garage door opener remote or keypad.
- If your door closes, your photo eyes are now aligned. If not, our team is ready and waiting to help.
Issue: When my garage door is closing, it groans, grinds and automatically reverses. It does this a few times before it closes and seals properly. What can I do?
Solution: First, check to see if your door is unbalanced (above). If that doesn't seem to be the problem, you may need to improve the seal. Using pipe insulation (this can be purchased at most hardware stores), stuff the strip of sealant on the bottom of your door.
Still not working? Contact us and one of our trained technicians will give you a hand.
Issue: The remote control for my garage door isn't working. What’s wrong?
Solution: Replace the batteries in your remote with new, fully charged ones. If the batteries don't seem to be the problem, your remote may need to be reprogrammed. You should also double check to ensure that you're not using LED lights in your garage as these types of lights can often interfere with the signal sent from your remote to your operator.
To reprogram your remote, follow these steps:
- Securely position a ladder underneath your ceiling-mounted garage door operator and carefully climb up until you can reach the back of the operator.
- On the back of the operator, you should see a button. Press and hold down the button for one second, then release.
- Carefully climb back down the ladder.
- Once on the ground, point your remote at the operator. Press and hold down the button for one second, then release.
- Your garage door should then open or close. If this doesn't solve the problem, give our team a call.
Issue: My garage door operator doesn’t respond to my keypad, remote control or keyless entry. How can I fix this?
Solution: First, check to see if your garage door operator is connected to a power source. If your operator's power cord is unplugged, plug it into an outlet in your garage.
If it's already plugged in, test the outlet with a separate electrical device, like a hand lamp, to see if the outlet is working. If you suspect there's a problem with the outlet, you may need to contact an electrician to fix the issue.
Issue: My garage door is jamming and grinding. What should I do?
Solution: Your garage door tracks may need to be realigned. This can be a tricky task that may be better left to a professional technician. Contact us to schedule a service call with one of our experts.
Issue: My garage door is moving too slow.
Solution: Your tracks, hinges, and roller brackets may need lubrication. The lubrication helps the garage door move smoothly along its tracks. To lubricate your door yourself, first clean all the parts with a mild detergent and soft cloth. Once all the parts are clean and dry, apply the lube according to the product’s directions.
If you’re not sure about doing it yourself, a technician will apply lubricant as part of a normal maintenance visit. Contact us today to schedule a maintenance call with a garage door expert.
The issue may also be that your opener’s speed was set too low. Most garage door openers have a setting switch that can be used to adjust the rate at which the door opens. If you’re not sure how to adjust it yourself, don’t worry; our experienced technicians can do it for you during a regular maintenance call.
Issue: My garage door is moving too fast.
Solution: A garage door that closes abnormally fast is a major safety hazard. The most common cause of this urgent problem involves the torsion springs and cables. The springs help to counterbalance the weight of the door while it’s opening and closing, while the cables help to support the springs. Both can wear out over time and break. Replacing the broken springs and cables is a difficult and dangerous job and should only be left to a licensed and trained professional. Call us today to request a service call from one of our experienced technicians.
Issue: Why are there flashing red lights on my garage door opener?
Solution: The lights in the opener will flash red when a problem is detected. You can try and resolve the issue by power cycling the opener. Turn off the plug at the socket and unplug the opener from the wall. Wait 10-15 seconds before plugging it back in and powering it up. If the light is still flashing, try again.
You may also need to reprogram your opener, adjusting its travel limits. The travel limits tell your garage door how far to go before stopping. If the travel limit is set too low, the safety sensors can view the floor as an obstacle, causing your door to open again after closing.
Issue: My garage door opener is running but my door won’t open. What can I check?
Solution: First, you can check to see if the trolley is engaged. All garage doors have a manual disconnect in the form of a lever that hangs down from the trolley. Pulling on this disconnects the trolley from the opener, preventing the motor from opening the door. To re-engage, for most systems, all you need to do is pull the emergency release up and back towards the opener, and the trolley will slide back into place.
If that’s not the issue, it may be that the door itself is stuck. Dirt and debris can cause the door to stick, and cleaning it is an easy fix. It might also be something more difficult, such as a kink in the track, a broken roller, or an obstruction. A professional door repair technician will be able to diagnose the problem and apply the appropriate fix.
Not every opener is compatible with every door; some are not powerful enough to lift the heavier doors. If you’ve installed a new opener recently, the issue could be that the weight of your new door is greater than your opener’s capacity. In this case, you’ll need a professional to come and inspect your system to determine whether or not there is a mismatch and install a more powerful opener.
Finally, if you have a chain drive opener, it may have a worn gear. The motor in these kinds of openers rotates a gear that moves the chain in your system. If the teeth on the gear become worn away, it will be unable to move the chain. The motor will run, but nothing else will happen. Call Creative Door Services to request an inspection from one of our professional repair technicians.
Common Gate Issues and Solutions
Issue: My automatic gate isn’t opening or closing. What’s wrong?
Solution: If the gate won’t respond at all, check to see if your controller (keypad or remote) is still working. Try replacing batteries or reprogramming them to ensure they’re functioning. If they are, the issue may be with the gate’s sensors. If the sensors are misaligned, blocked, or damaged, they will prevent the gate from moving.
If your gate starts to move but stops and reverses, there may be something obstructing its path. Check for debris such as twigs or leaves that could be triggering an auto-reverse response.
Finally, check to see if there are any issues with the gate itself by giving it a visual inspection. If it’s out of alignment or the tracks and hinges are worn, that will cause your gate to operate incorrectly.
Issue: There are strange noises coming from my gate. What could be causing these sounds?
Solution: Strange noises emitting from your gate are a sign that there is some issue affecting its operation. There are four types of noises that you might hear:
- Squeaking and Creaking: these sounds are likely caused by a lack of lubrication. You should be oiling your gates once per year at a minimum, but that can change depending on factors such as age or usage. Make sure you use a lubricant formulated for garage doors, such as white lithium grease. Lube should be applied to the tracks and hinges. Make sure they have been cleaned first, or else the lubricant won’t have the desired effect.
- Grinding and Grating: grinding usually means your gate is running into resistance somewhere. A good initial troubleshooting step is to lubricate all the moving parts. If this doesn’t solve the problem, it may be a structural issue instead.
- Noises in the Operator: your gate operator is making unusual noises, indicate a buildup of dirt, moisture, and debris in the motor. Over time, these contaminants can damage your operator.
- Beeping from the Operator: a beeping operator means that the battery is low. In some cases, such as a power outage, this is only temporary. However, your battery may also have reached the end of its lifespan, which necessitates a replacement. Garage remote batteries tend to last around two years. Replace the battery with a fresh one and see if the remote works. You can also use a battery tester, which should be easily available at any local hardware store.
Issue: My gate keypad is not working, and I can’t open my gate, what should I do?
Solution: Your first step should be to try another controller and see if that one works. If that one isn’t working either, then you know the problem isn’t specifically with the keypad, but with the system as a whole.
If the problem does truly lie with your keypad, your next step should be to check the batteries, as they may have lost their charge. The battery compartment tends to be on the face of the keypad and can easily be accessed either by pressing and sliding the cover off. In some cases, you may need to unscrew it instead.
The issue may also be with the electronics in your keypad. Look for signs of damage or vandalism. Environmental factors such as sand, salt, or dust can also cause wear and tear. You should call a professional technician to have your keypad repaired or replaced, using other entry controls in the meantime.